Pages

Friday, 30 March 2012

Embroidery designed purse


Back on the blogging scene after a long hiatus.

It’s a beginning of a new life post marriage. I try to recall mom’s recipes, resource managing tactics, budgeting, inventory of items and so much more.
I now realize I have become my mom’s replica, my idol in true sense. 

It was in 90’s when mom used to sit with these Assami ladies at the military cantonment and learnt knitting. She has since mastered all the forms of thread work.

I used to hate it when she told me to roll out balls out of the twisted woollen yarn that she brought from the market. Little did I realize then that someday I would develop the same liking? This post is dedicated to my mom.

As I teach some basic stitches to my students, thought of being creative, went ahead and designed a handmade, embroidered purse.


You will need: felt cloth: ½ meter, embroidery thread, needle, scissor and polyfiber sheet-1/2 meter, white fabric -1/2 meter, 


embellishments of your choice.


 Take a ½ meter felt cloth and fold it into half.


Cut out a rough outline of the desired shape of the purse on a piece of paper, which will then be placed on the folded felt material and cut accordingly.


 Below you can see the cut out of the felt fabric. You can make any desired shape of the fabric for the purse.


Make equidistant lines with the pencil on the felt, which makes stitching easier.
I have made 5 equidistant rows on the front side of the fabric. 


I have used 2 types of stitches in alternate rows which are then decorated with some colorful embellishments.

1) Herringbone stitch: it will be easy for you all to do these stitches if you refer to the link below.I have been referring to her website for a while now and love the way she has presented  the different stitches.


2) Running whipped stitch: it’s the easiest of the designs and comes out well if used with good color combination.
link below explains the steps for the running whipped stitch.


Between the whipped stitches I have done a double cross stitch with the white thread.


This is how the front side of the purse looks with alternate’s stitches and decorated with embellishments.


  After that the embroidery is done, it’s time to assemble the fabric into a purse.

To make the purse more durable I have used a thin sheet of polyfiber which you always find in the form of shirt inserts.

Cut the polyfiber and white cotton fabric to the shape of the purse. 


Now cut 3-4 inches of cylindrical felt fabric to form the joint and also increase the width of the purse.


With the help of a sewing machine stitch the 3 layers of felt, polyfiber and white cloth together and then attach the joints on the sides like the picture below.
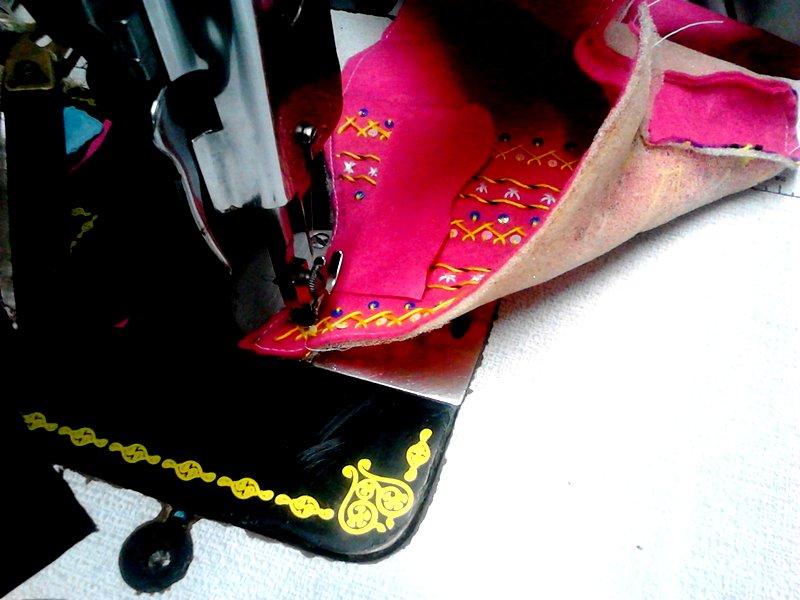


 This is how the purse should look after stitching.


This is how the purse looks on the back side.


Lastly the zipper to be attached on the open end to make the bag more secure.
Thus your purse is ready.


It always gives me a feeling of content and pride to come out with such creative things.

See you soon.

Tuesday, 7 February 2012

A Goodbye

 Welcome Again,


                            We keep meeting different people some stay, some leave us. I feel its’ important to make someone feel special for their existence in our life for a period.  
I had one of my colleague leaving the institute and thought of greeting her good bye in a creative way.  She has always been experimental in all ways hence thought of using the header “STAY NEW”.


Now I had a group of creative minds from first year who brought the entire imagination on paper.
 Sketching would have taken time so took a photo copy of an image. Made a perfect cut and stuck it on a card cover.
 We wanted to highlight the features in the image for which we used an acrylic highlighter on the hair.


The black highlighter helped to enhance the beauty in eyes also.


You may see some red beads in one corner which were used for the bag strap.
The card was left to rest so that the beads would adhere to it properly.


   Silver glitter was used for the words and to highlight the hair.
Red color pencil is used for the hair scarf. 


Lastly we added some red glitter spot to create a design. This actually gave an embossed effect to the picture.


Thus the card is ready.


We  also made a see through insert for the greeting card.
First the card size was measured and then a bigger size card paper was cut. 


 Then a window was made on one side of the paper and gelatin paper was stuck.


Finally we made some designs on the sides of the inserts.


And this was the final product. It always a delight for a teacher to see what you imagine is the same you get from the students.
Aiswarya ,siddhesh,Anu, Sateyendar,Prateek   - KEEP UP THE GOOD WORK.


Monday, 6 February 2012

simple yet beautiful


I recently visited the dagdusheath  halwai ganpati  in pune when I was stunned to see the beautiful peacock feathers at a shop. I couldn’t resist purchasing them. I just admire the beauty of Mother Nature.


You could check my first post a demonstration on how to make a tissue flower, some of them I have used in the pictures below.


I have tried using them to make an arrangement along with peacock feathers.
The vibrant colors of peacock feathers can be used to make an arrangement and it looks beautiful.


Also below you can see some paper flower arrangement which serve a good alternative for flowers in case of emergency.


Tuesday, 24 January 2012

Flower arrangement:


Bread feeds the body, indeed, but flowers also feed the soul. - The Koran


 I teach flower arrangement for the second year students at my college, thought of sharing some ideas of flower arrangement with you all. Flowers have a physiological, emotional effect on the human mind depending on their colors. 


If you walk across the dadar flower market you see all varieties of flowers. You also end up purchasing some beautiful flowers but less do we know how to store them.

Tuesday, 29 November 2011

Handmade cushions


Cushions: You cuddle them, are comforted by them and at times shed tears on them. It is a synonym of comfort and elegance.
 This post is on handmade cushions where in I have used my skills to enhance the appearance. I ended up making one of the cushions in my train journey to Jamnagar and back. It’s easy to make and an excellent work of art to enhance the room décor.


Material required: 1 ½m satin cloth, tailors chalk, Sewing needle and thread, scissors and poly fiber (1kg)


      I.            Procedure: First take 11/2 m cloth lengthwise and divide it into 2 equal parts. This length gives you 2 exactly sized cushions.


      I.            Now measure 5inches with a ruler from the end of the cloth and cut a 5 inch cloth from both the parts. Keep this cut piece aside as we use it to make the center of the cushion.


      I.              Take first part of the cut fabric. Place the mat surface of the cut fabric facing you.
  II.            Now draw 2 inch wide lines horizontally and vertically with a tailors chalk. A tailor’s chalk is easily available in stationary shop –this chalk is more prominent on the cloth surface and easy to use on fabric.


      I.            After drawing the lines you will find equidistant squares on the cloth.
  II.             Draw a diagonal line in alternate squares in a column; repeat the same procedure in the alternate column. 
      I.            In the empty adjacent column draw diagonal lines in opposite direction again. Look at the picture below for clarity.


      I.            After drawing lines, with the help of sewing needle and thread make 2 pleats following the diagonal line in Single Square as shown in the picture below.


Complete the pleats on the entire fabric.


After pleating the fabric should look something like this


                Ball puffs : We have to utilize the 5inch cut fabric and poly fiber for making the balls


Take one piece and divide it into 2 equal parts thus we make 2 balls from a single piece. The cut fabric should look something like this.


Take 1 piece of fabric and insert poly fiber in the form of a ball. Stitch the fabric on the wool with a thread.
4 balls can be made from the 4inch cut fabric.


Now at one of the ends with the help of a running stitch collect the entire fabric and tie it together. Thus we seal the cushion from one of the ends.


      I.            Use poly fiber to fill in the cushion.Now place a thin polyfill sheet on the base of the cushion to have a uniform 
  II.           Spin the poly fiber with hand and then stuff it inside the cushion.


  Once the fiber is stuffed close both the ends. The cushion should look like this.


Finally attach the balls in the center on both sides of the cushion. 
Your cushions are ready!